
Java is a powerful and popular programming language that is widely used for developing a variety of applications, ranging from desktop software to enterprise-level systems. To start programming in Java, you’ll need to set up a development environment. In this article, we’ll guide you through the process of installing Java and using IntelliJ IDEA, one of the most popular integrated development environments (IDEs) for Java development.
Installing Java
When it comes to installing Java, there are two primary methods you can choose from. Let’s explore both options:
- Installing Java from the Official Website:
- Go to the official Java website (https://www.java.com) in your web browser.
- Look for the “Download” or “Java Download” button on the homepage.
- Click on the button, and you will be redirected to the Java download page.
- Select the appropriate Java version and operating system for your machine.
- Click on the download link to initiate the download process.
- Once the download is complete, run the installation file and follow the on-screen instructions to install Java on your system.
- You can also download java from Oracle .
- Installing Java using IntelliJ IDEA:
- I will explain this method after you have installed IntelliJ IDEA.
Installing IntelliJ IDEA
- Download IntelliJ IDEA: Visit the JetBrains website (https://www.jetbrains.com/idea/) and download the IntelliJ IDEA Community Edition, which is free and suitable for most Java development needs.
- Run the installer: Once the IntelliJ IDEA installer is downloaded, run the executable file and follow the installation wizard. Choose the installation directory and select any additional components or plugins you want to include.
- Configure IntelliJ IDEA: After the installation is complete, launch IntelliJ IDEA, then select Customize. You’ll be prompted to choose the theme and keymap preferences. Select the options that suit your preferences or stick with the default settings.
- Create a new Java project: To create a new Java project, click on New Project.

Installing Java using IntelliJ IDEA:
- If this is your first time using IntelliJ IDEA, it will prompt you to set up the development environment.
- IntelliJ IDEA will automatically detect that Java is not installed and offer to install it for you.
- Select the desired Java version and vendor from the provided options.
- Click on the “Install” button to let IntelliJ IDEA handle the installation and configuration of Java for you.
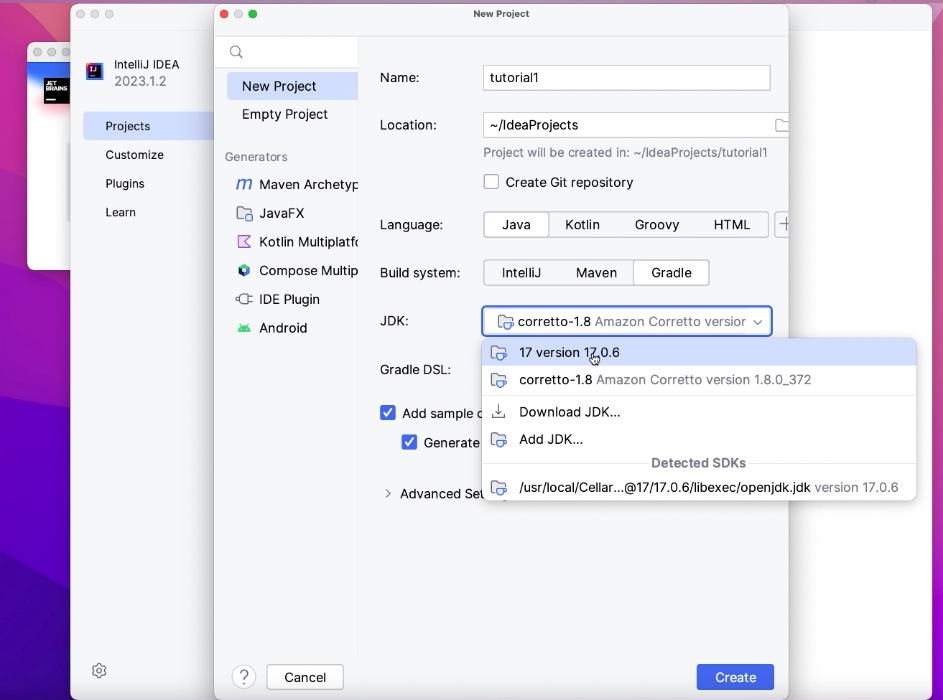
By choosing the option to install Java through IntelliJ IDEA, the process becomes much simpler as the IDE takes care of the installation and setup steps for you. This ensures that Java is properly configured and ready to use within the IntelliJ IDEA development environment.
I have created a YouTube video that guides you through the installation of Java and IntelliJ IDEA.
Congratulations! You have successfully installed Java and set up IntelliJ IDEA for Java development. Now you can start writing, testing, and debugging Java code using the powerful features provided by IntelliJ IDEA. Remember to explore the various options and features available within the IDE to enhance your productivity and make the most of your Java development journey. Happy coding!!
[…] our previous tutorial, we covered the installation of Java and IntelliJ IDEA, as well as creating a new project. Now, […]
[…] our previous tutorial, we covered the installation of Java and IntelliJ IDEA, as well as creating a new project. Now, […]